Most of the time you will be connecting your Meraki MV security cameras to a wired network. The wired network is usually what provides the power needed and connectivity for the cameras to power up and function correctly.
However, there are occasions when you don’t have wired ethernet connectivity to the location where the camera is needed. You can either have a cable run to that location or use the built-in Wifi capabilities of any generation 2 Meraki MV security camera. Of course you will still need to power the camera. This can be done by drawing power from a nearby outlet and using a power injector or by utilizing an existing 12v or 24v low voltage wiring that may already be installed from a previous security camera.
To keep things as short and to the point as possible we are going to assume you can power the camera and the camera is within range of a Wifi access point and the signal is relatively good.
First, we will run through configuring wireless and the wireless security options on MV security cameras in Part 1. Then in Part 2 we will run through configuring 802.1x Authentication and Authorization profiles in Cisco ISE that allow the MV security cameras to securely connect to the Wifi network.
After logging into the Meraki Dashboard you will need to navigate to the camera you would like to configure and then go to Settings – > Wireless profiles. For example here is a screenshot of MV32 configuration settings.
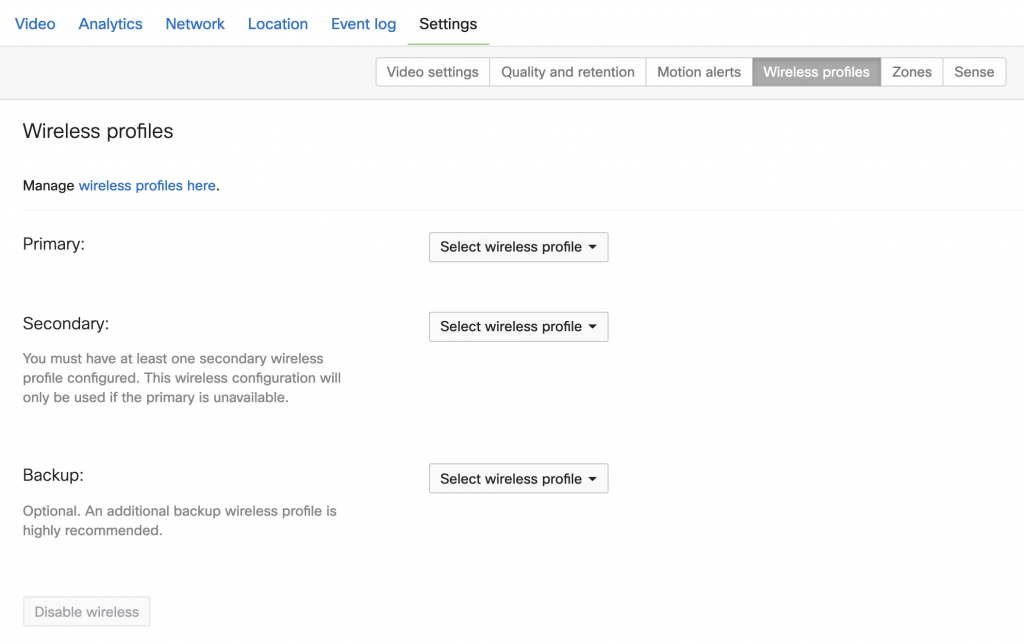
From here you will need to configure at least 2 wireless profiles. This allows for a Primary and Secondary wireless network configuration. What is cool about this is that this allows you to make changes to a Primary network configuration and still be able to get the MV camera is something goes wrong. You can even configure an additional “Backup” configuration as well in case both the Primary and Secondary connections have issues. You will need to configure the wireless profiles by clicking on the Manage wireless profiles here link.
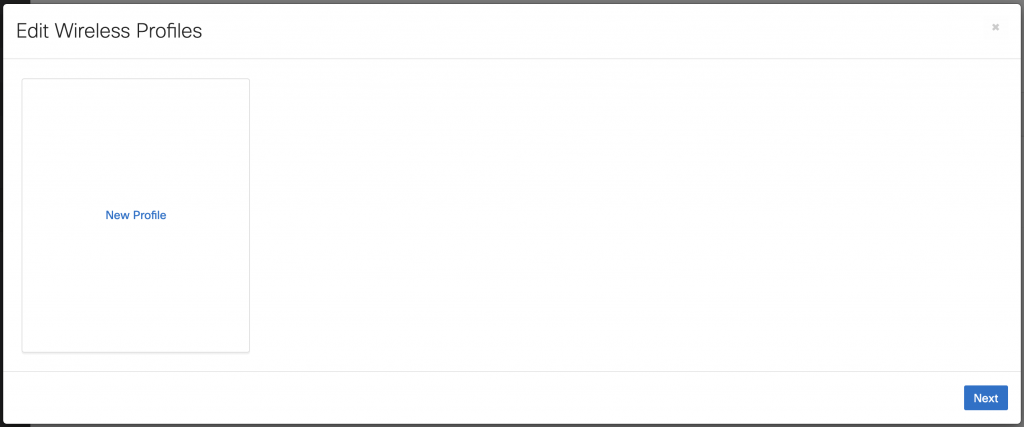
After clicking on New Profile you are presented with a couple of options
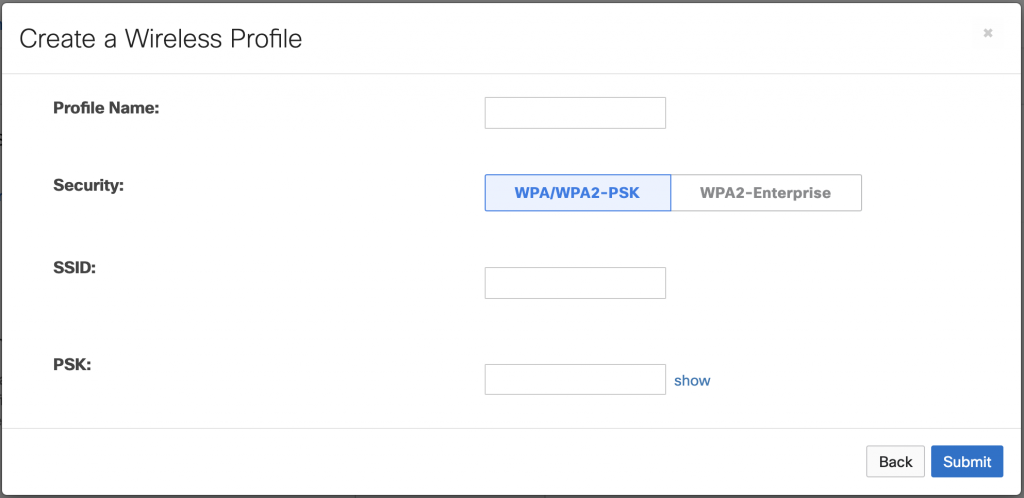
The most common and easiest option would be to use WPA/WPA2-PSK. Using this option will configure a wireless profile to connect to a wireless network that is using WPA/WPA2-PSK for security. You only need to enter three things…
Profile Name: <descriptive name>
SSID: <SSID Name of Wireless Network>
PSK: <Passphrase for Wireless Network>
Once those are entered correctly click on Submit
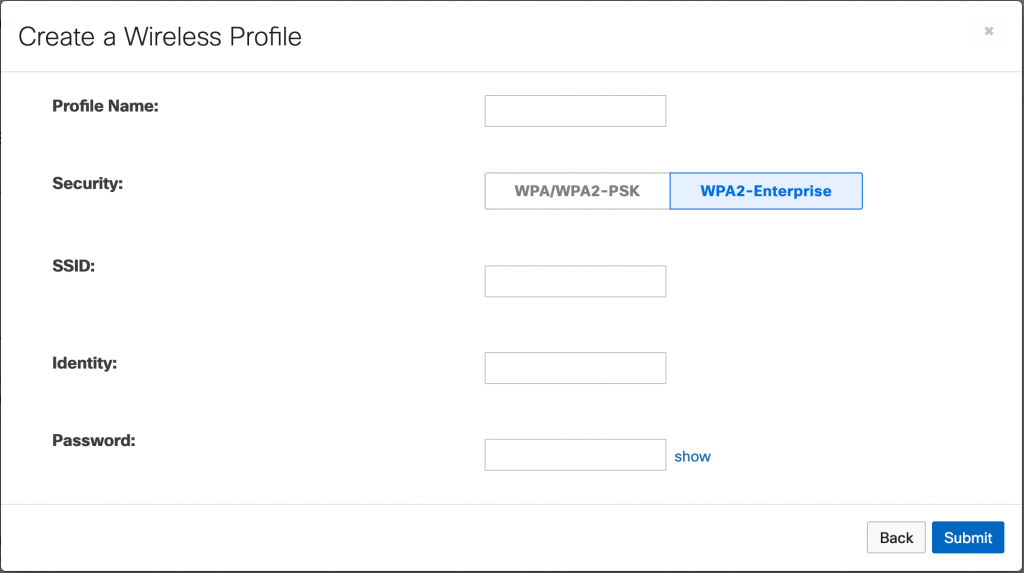
What may be considered a more secure option is to use WPA2-Enterprise.
Using this option will configure the wireless profile to connect to a wireless network that is using 802.1X with EAP-TTLS. This option requires a Profile Name and SSID along with the Identity and Password. Think of this as a username and password combination. For the purposes of my lab I am going to use a username and password that I will later create in Part 2 of this post. The username will be: MVCamera and the password will be: <super secret password>.
Reminder to what I mentioned above… you are required to configure two wireless profiles. This allows you to change a primary and not lose connectivity to the camera and it also allows for a back network configuration for the camera to use in case the primary wireless network goes down or becomes unavailable. Below is an example of what that would look like before hitting Next.
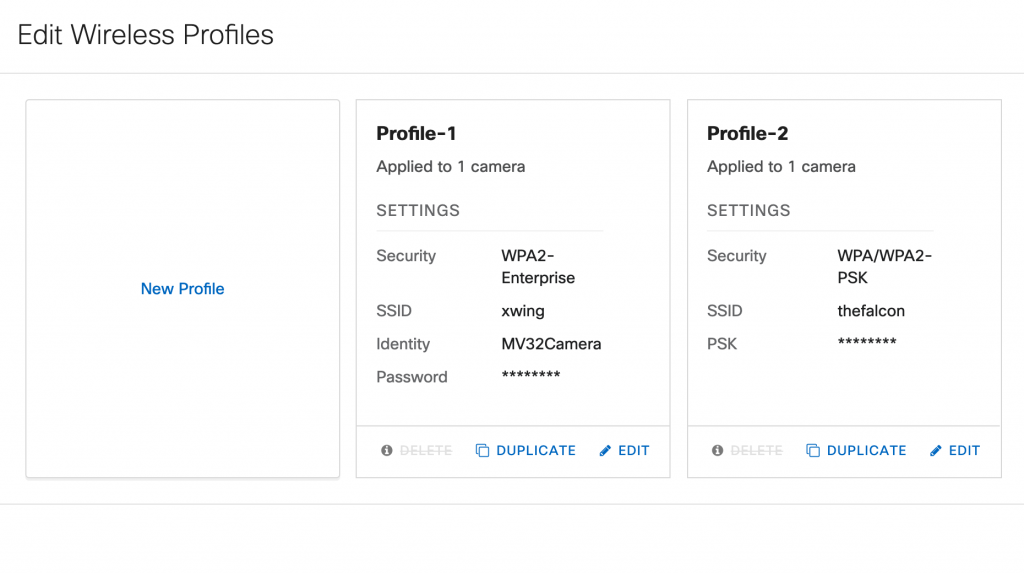
Now that the wireless profiles are configured you can select your primary, secondary, or even a tertiary if wanted for the MV camera.
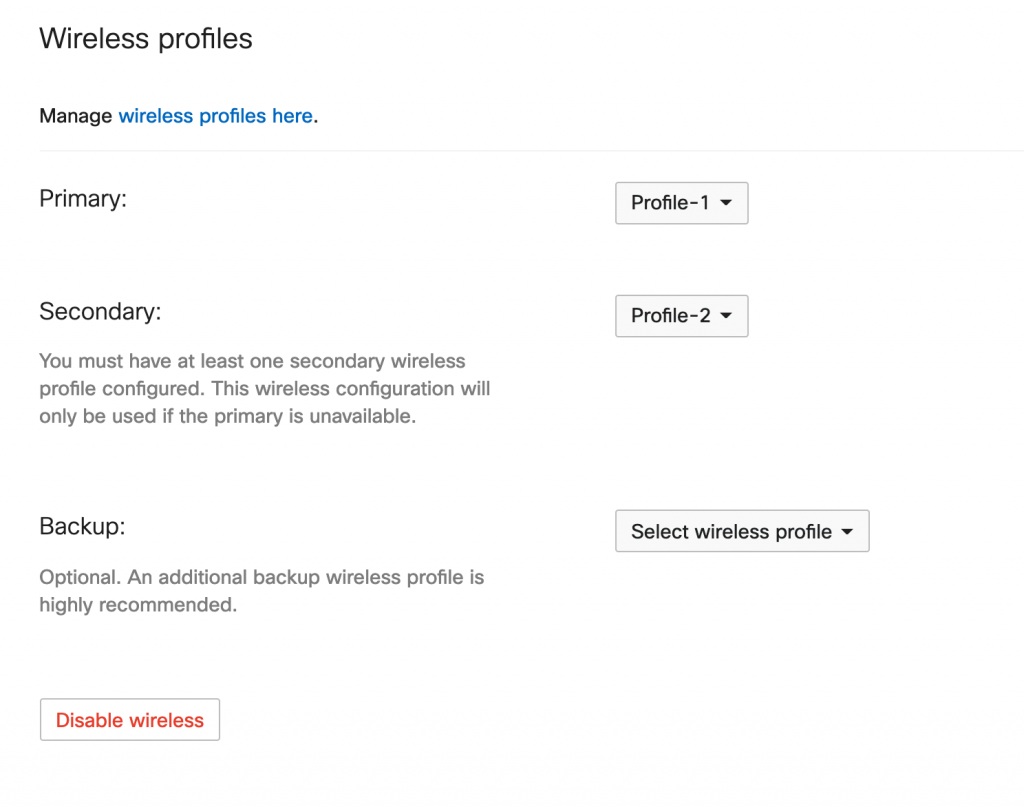
At this point click Save

Above is what you will see in your list of MV Cameras. In this example the MV32 is connected to a wired network and is configured to connect to the xwing and thefalcon wireless networks.
For additional details or questions about how to configure Wireless Profiles on MV security cameras check out the official documentation.